

Someone asked for a tutorial on the ribbed beads with the twisted ends that are shown in the header of my blog and in the photo above.
Here's the process:
 |
| Start with any color you like. This is on the thickest setting of my machine. |
 |
| Add other colors and put through pasta machine multiple times to blend it. Put it into the pasta rollers in the same direction every time to end up with stripes. |
 |
| I didn't think I had enough colors so I added more. |
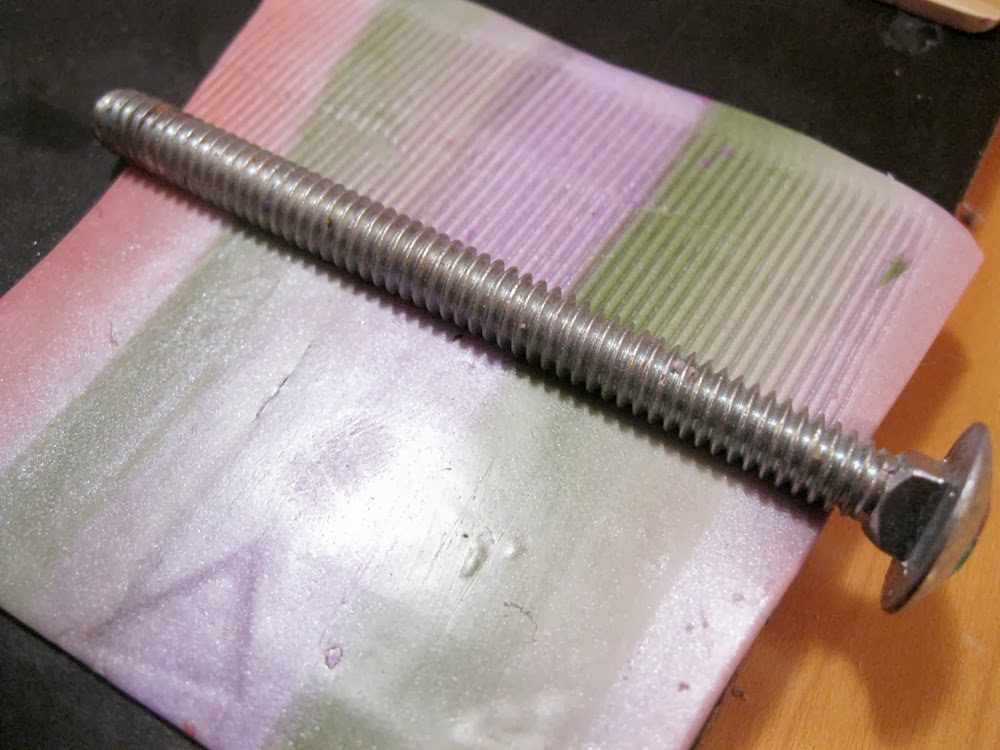 |
| Use a long bolt to create the ribs. Make sure it will be long enough to cover your bead form. |
 |
| Line a pre-baked bead up at the end of the sheet making sure to keep holes pointing out to each end of the sheet.. |
 |
| Wrap ribbed sheet around the bead. Trim and fit where the start and end of the sheet meet. |
 |
| Holding the bead with your fingers on each end, gently pinch and twist the edges while turning the bead around and around. Be careful not to squish the ribs. I use Kato clay which is firm and holds its shape well. I don't know what kind of results you would get with other brands. |
 |
| Twist it a bit more. |
 |
| Slice off the ends to make them straight and gently pat the edges to round them. |
 |
| Brush the whole bead with a mixture of carbon black Pearl Ex and a tiny pinch of Pearl Ex gold for shimmer. Bake according to the instructions for your clay. |
 |
| When it's cured, sand the bead with a purple 3M Sandblaster 400 grit sheet, to remove the black from the high surfaces but leave it in all the grooves. You can leave it matte or buff it with a muslin wheel. I don't recommend using regular sandpaper. It is not flexible and will end up removing too much from the high spots and not enough from the grooves,. Your bead will probably end up splotchy instead of prettily graduated. |
 |
| And there you have it! |
What a really neat bead Becca! I love doing blends must get the clay out and start the new year!
ReplyDeleteThank you so much for doing the tutorial for this!! These beads are very famous in the polymer clay world and I'm so grateful that you shared your secrets! :) By the way....I love your new haircut!!! Very sassy, sexy and it fits you perfectly!!!! Well done to your hairdresser!!!!
ReplyDeleteWow. That is a spectacular bead. Thank you for sharing your talents with all of us! Enjoy the day. Erin
ReplyDeleteThank you for sharing your amazing creative process. It helps me to see other possibilities. :-)
ReplyDeleteThank you for sharing!
ReplyDeleteWonderful Becca! Thank you for revealing one of you secrets. You are a very generous artist. Wendy M
ReplyDeleteHi it's very cute! I'd like to know if the carbon black was very shiny? I have only seen a few examples online of it being used. I'd love to know before I buy it. I know their gold and pearl are top-notch much like Lumiere's paints
ReplyDelete